CDON Integration
Omega Shopping CDON integration allows to do next:
- Create and import new products from Shopify to CDON
- Fetch already created on CDON products and synchronize these listings with the app
- Automatically update all product changes from Shopify to CDON
- Export products to the following markets:
- Denmark
- Finland
- Norway
- Sweden
- B2bSe
- Automatically translate exported listings via translation services
- Automatically export new Orders from CDON to Shopify
- Set VAT values for each market
- Set Min and Max Delivery Time for each market
Main Settings
How to create and connect the CDON Integration
Go to the app tab Integrations and click the button Add Integration.
Next, click the button Select in front of the CDON line.
Follow all the steps and fill in the required fields on the Steps below.
You can change or fulfill some fields later after the successful CDON connection.
Steps:
1. Configuration Step
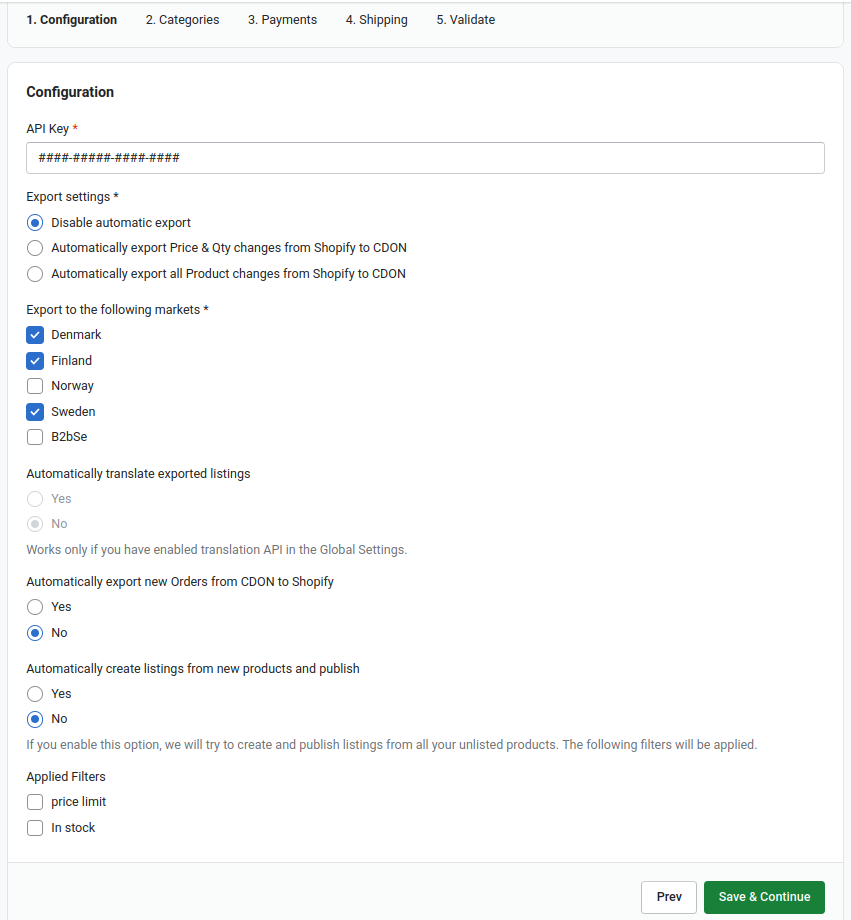
- API Key
An API key is required to connect your CDON account with the feed app.
To get your API key go to your CDON merchant account > tab Help and copy the CDON platform integration > API Key value:

Automatically translate exported listings
To enable translations, go to the page Translate the feed for steps and details.
- Export settings
and - Automatically create listings from new products and publish
Allows creating product listings and publishing all of them automatically.
- Applied Filters
Create and apply specific filters to exclude the selected products from listings on CDON.
Check the information on creating filters here: Feeds > Filter exported products.
- Automatically export new Orders from CDON to Shopify
CDON orders will be exported into the Shopify Orders tab with the "CD-xxxxx" prefix if this option is enabled. Thus, the exported orders could be operated as the default Shopify order.
2. Categories
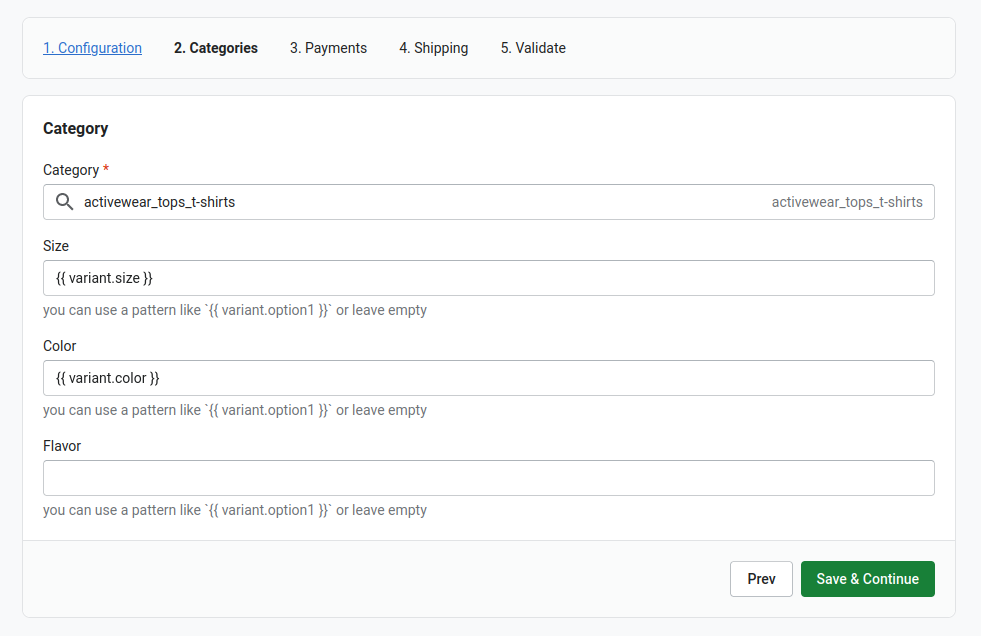
Category *
CDON requires to use its own category names for the store products.
Start typing inside this field the name of your main category and autocomplete will propose the available category name from the CDON taxonomy list. This CDON category will be the default category for your store products.
In case you have more than one store category, you will be able to create the specific category templates for each product type after the main connection is made.
CDON allows import variation by adding to the product listings next attributes:
- Size
- Color
- Flavor
For each variation field, you can use variant option attributes:
{{ variant.option1 }}, {{ variant.option2 }} or {{ variant.option3 }}
If you don't know what option exactly you need to set, you can use these custom attributes that will automatically try to find and set available sizes and colors:
Sizes:
{{ variant.size }}
Colors:
{{ variant.color }}
if you don't have colors or sizes in your products, you can leave these fields blank.
3. Payments
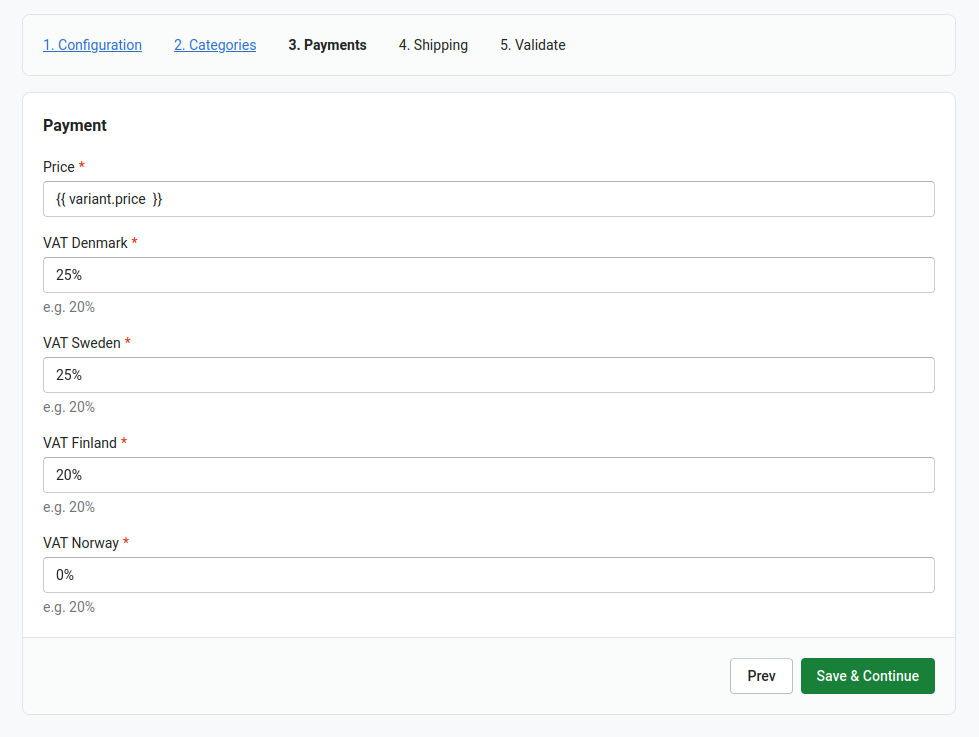
- Price
Export the product price from your store.
If you want to increase or decrease these default prices,
you can use Liquid Modifiers.
Check here for the details Feeds > Customize feeds template.
Set VAT rates for each selling market.
4. Shipping
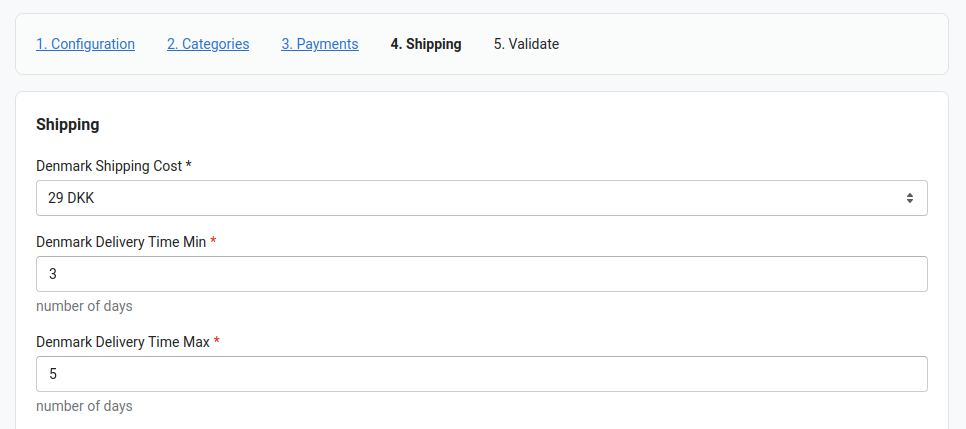
Select from the list Shipping Cost values in the currency of each market.
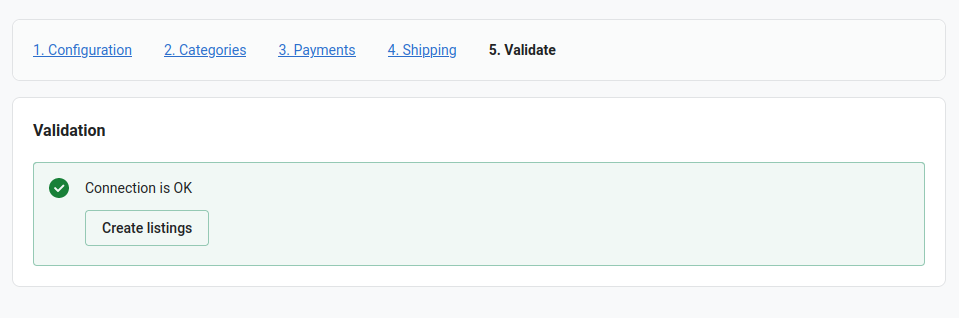
5. Validate
If the connection has been established and all steps with main option settings have been passed, you will see this message:
How to list products after connection
- Create Listings (Products tab)
- Publish products (Listings tab)
- Update and add Templates (Templates tab)
- How to apply new Templates
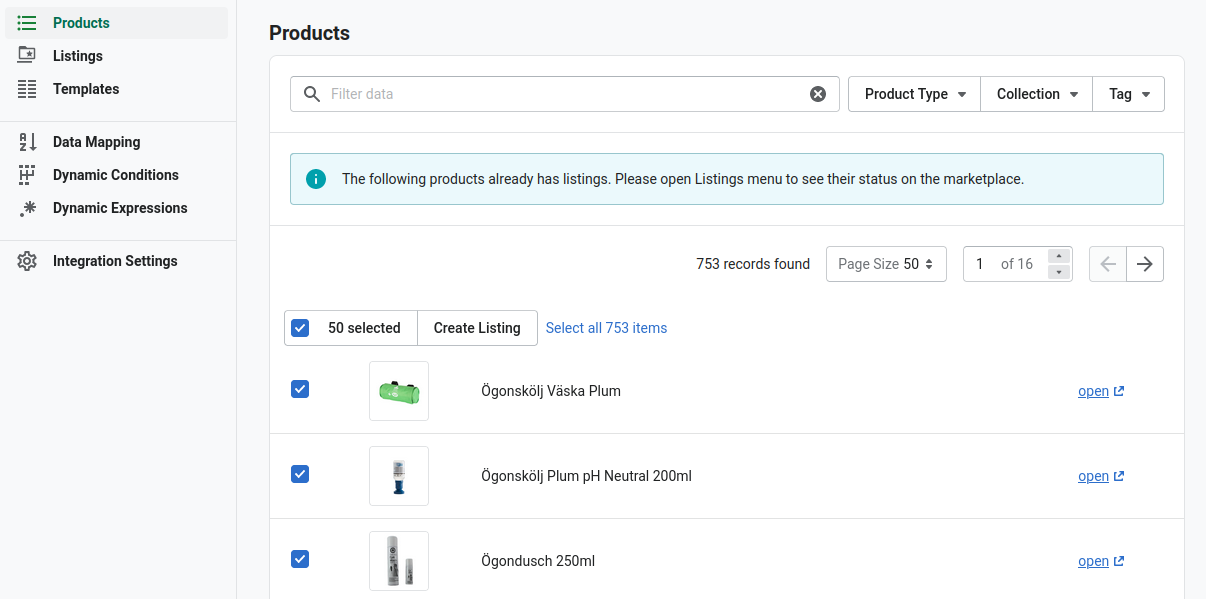
When we're done connecting to your CDON account, go to the Products tab on the main integration page.
Products
On this page, our app shows all available products in your store.
Here we decide what products we need to list on the CDON marketplace.
If you want to list all of your products, tick on the table column checkbox, click the Select All button, and Create Listing.
In case you want to list only specific products, you can use Product Type, Collection, and Tag filters in the right upper corner.
After applying the filter, you will be able to create listings only for these products.
⚠️ If the option Automatically create listings from new products and publish was enabled when setting up the connection, all products will be listed automatically. There is no need to create listings manually on this page.
After creating listings of the products, we can go to the Listings tab.
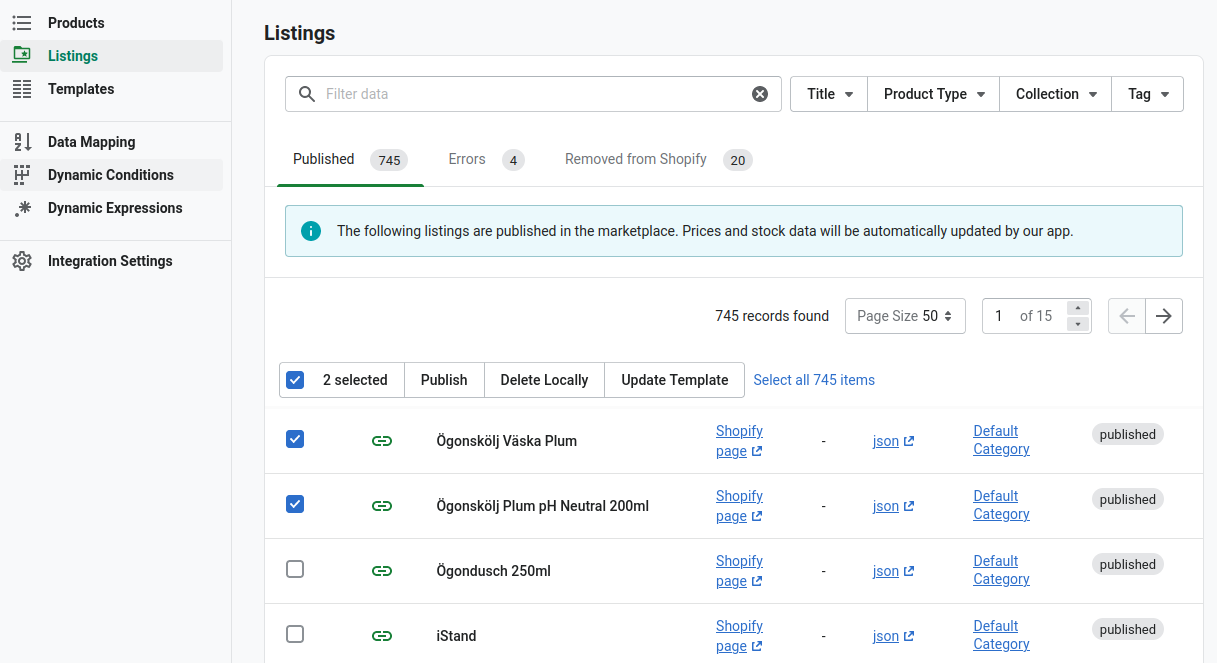
Listings
On this page, the selected products are ready to be published to CDON.
Tick on the table column checkbox, click the Select All button, and Publish your products.
Afterword, in case of successful import, the products will receive status Published within a few minutes
and will be added to the Published block.
In case of any errors or problems with the publishing, some products will be moved to the Errors block.
This table block will provide information about each product with the listing problems. All of these products will come with an error message to help you understand what needs to be fixed.
After fixing the errors, these products should be published manually.
A default main category was set up during the main connection for all store products, but if we have more than one store category, we need to go to the Templates tab and create additional category templates.
Check out Category Templates below.
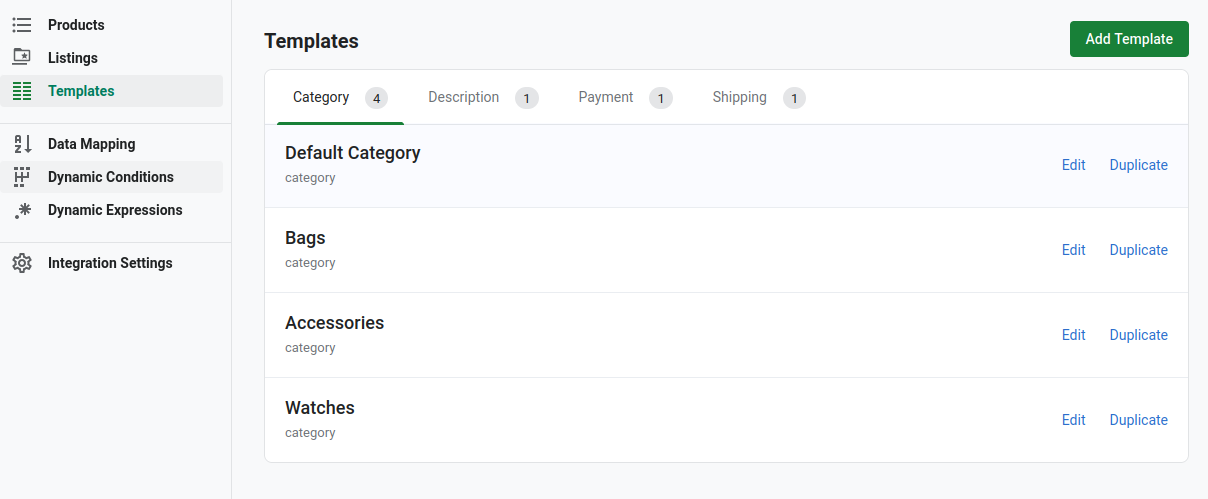
Templates
Main products configurations that were set up during the initial CDON integration connection are stored in the Templates tab as the Default templates.
There are four additional tabs on the Templates page:
For each template and field Dynamic Conditions, Dynamic Expressions, and Liquid Filters could be used to modify the output.
- 1. Category Templates
Update the Default category template or create new templates for each store category by clicking the Add Template button.
Set up the templates fields exactly as was configured default category on the initial connection step "Categories" here.
- 2. Description Templates
Description templates allow setting up next product attributes:
- Title
- Description
- GTIN - product barcode (EAN, UPC)
- MPN - most commonly product SKU
- SKU
- 3. Payment Templates
Payment templates allow setting up the product prices and VAT rates for each market.
- 4. Shipping Templates
Shipping templates allow setting up the shipping prices for each market,
also, set Delivery Time Min and Delivery Time Max for the product shipping time.
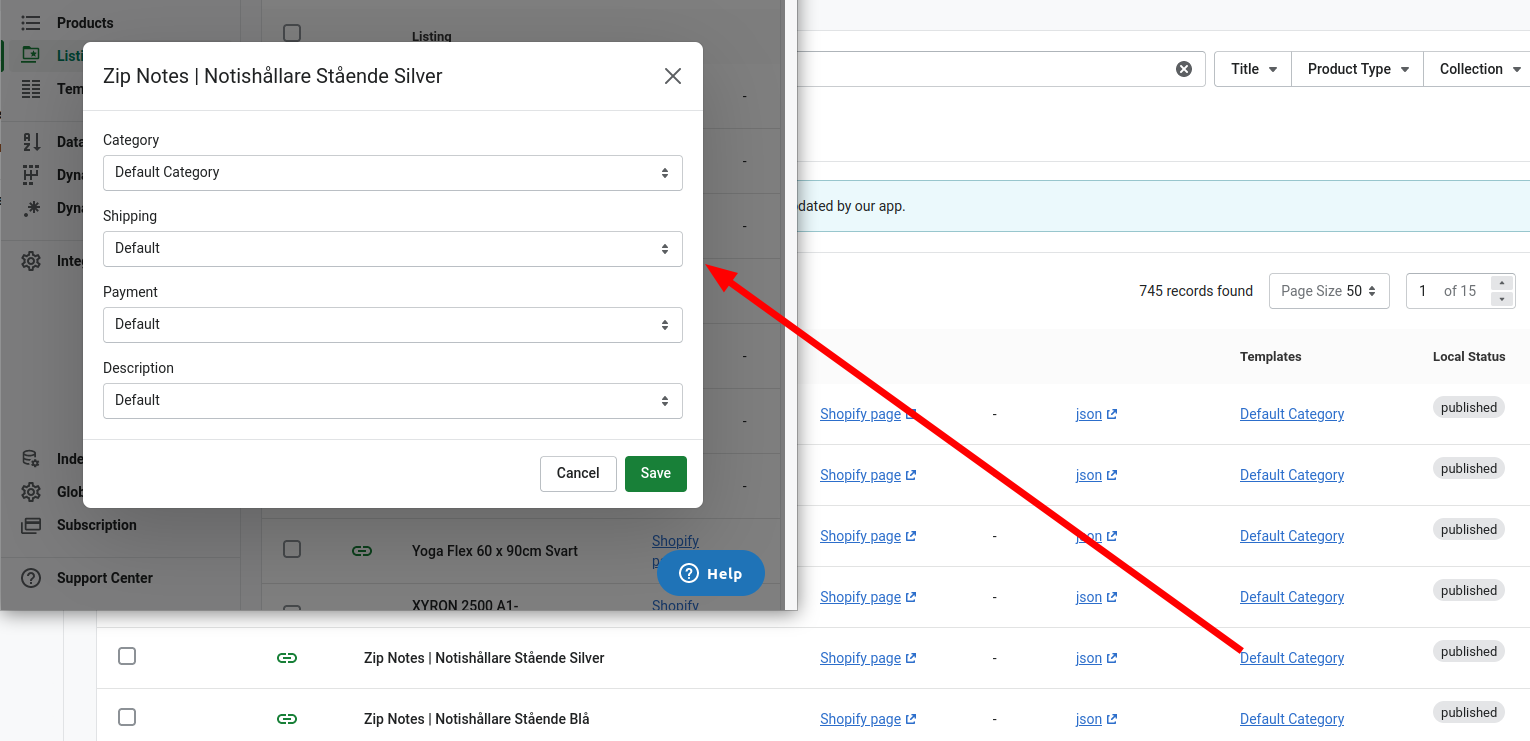
How to apply new Templates
After new templates are created, we need to select them instead of the Default templates.
Go to the integration tab Listing and find the column Templates.
Under this column, click on the "Default" button to open the Templates Selection Block.
Set the appropriate template for the required block.
It is possible to make bulk template updates.
To do this, use the filters like Title, Product Type, Collection, and Tags, which are located in the right upper corner, to show only specific products.
When one of the filters has been applied, you can tick the checkbox to select those products and change the templates for those products simultaneously.