Feed template customization
With feed customization, you can personalize your feed's structure for your Shopify store and change the feed's output using the Shopify Liquid template language.
Customize a prebuilt template
If you've created a feed using Mulwi's prebuilt template, you first need to customize this feed in such way:
- Navigate to the feed you want to customize.
- Find the Template section.
- Click Customize Feed.
- Carefully read the warning and click Continue.
NOTE
Once you convert a prebuilt feed to a custom one, you won't be able to undo this change.
Edit the feed template
To open the feed's template editor, simply click the Edit template button in the Template section of your feed's configuration page.
For your convenience, every template editor page has a quick reference of all the attributes (Liquid objects) and modifiers (Liquid filters) that you can use in the opened feed. You can view this reference at any time by clicking Variables & Filters at the top of the template's editor.
Edit a CSV/TXT/XLSX template
Templates for CSV, TXT, and XLSX feeds are represented as a table where each row corresponds to one column in the file.
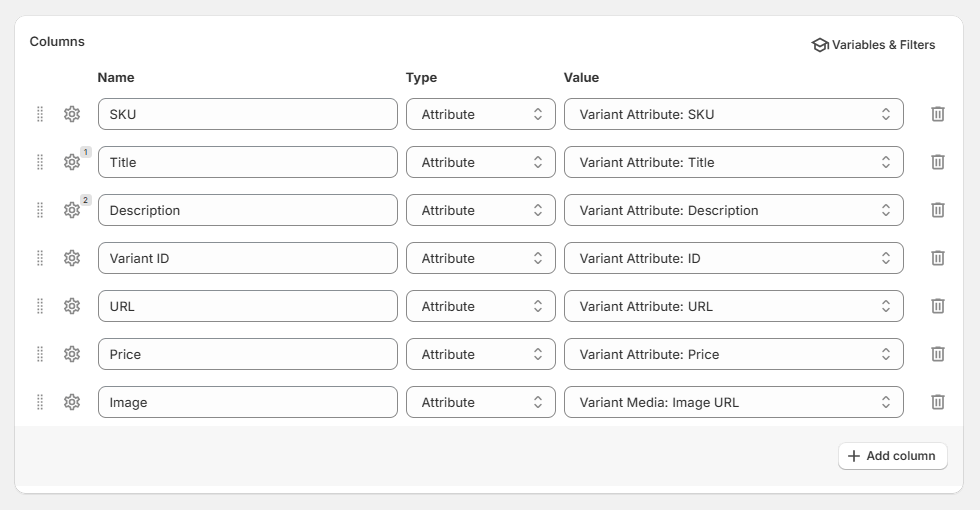
You can add new columns with the Add column button and remove columns by clicking the trash bin icon next to the row you want removed.
You can also change the order of the columns by dragging around the table's rows.
To begin dragging a row, click and hold down on the vertical dotted lines icon next to it.
Change the attribute's value
There are two ways for providing the column's value: by selecting the corresponding attribute, or by writing a Liquid expression that returns a single value.
To select a predetermined attribute, set Attribute as the column's data Type and choose the appropriate attribute from the dropdown menu in the Value field.
To write a Liquid expression instead, set Expression at the column's data Type and provide the whole expression as a single line in the Value field.

Change the attribute's modifiers
If you're setting the column's value with a Liquid expression, you should use the modifiers (Liquid filters) directly in that expression.
If you're instead selecting a predetermined attribute, you can change the modifiers (Liquid filters) applied to the column's value in such way:
- Click the gear icon next to the row you want to change.
- Click the Add modifier button under the attribute.
- Select the required modifier in the new dropdown menu that appeared.
- Repeat steps 2-3 for all the modifiers you need.
To remove a modifier, simply click on the trash bin icon next to the modifier you want removed.

Edit an XML template
Templates for XML feeds are represented as plain text inside a text editor, where each pair of <>...</> tags corresponds to one element.
You modify the XML template using the Shopify Liquid language, Liquid objects, and Liquid filters.
To list your products or product variants, you need to iterate over each item within the context.products or context.product_variants object respectively.
For more information about these Liquid objects, please visit the Attributes (Liquid Objects) page.
Here's an example of an XML feed template for Google Shopping listing product variants:
Typical XML feed schema for Google Shopping
<?xml version="1.0" encoding="utf-8" ?>
<rss version="2.0" xmlns:g="http://base.google.com/ns/1.0">
<channel>
<title><![CDATA[Google Shopping Feed]]></title>
<link>https://mystore.myshopify.com</link>
<description>Data feed</description>
{% for variant in context.product_variants %}
    <item>
    <g:id><![CDATA[{{ variant.id }}]]></g:id>
    <g:item_group_id><![CDATA[{{ variant.parent_id }}]]></g:item_group_id>
    <g:title><![CDATA[{{ variant.title | t | truncate: 70, "" }}]]></g:title>
    <g:link><![CDATA[{{ variant.url }}]]></g:link>
    <g:price>{{ variant.price }}</g:price>
    <g:description><![CDATA[{{ variant.body_html | strip_html | t | truncate: 5000, "" }}]]></g:description>
    <g:product_type><![CDATA[{{ variant.collection_title | t }}]]></g:product_type>
    <g:google_product_category><![CDATA[{{ variant.attr_google_collection_mapping }}]]></g:google_product_category>
    <g:image_link><![CDATA[{{ variant.image_url }}]]></g:image_link>
    {% for image in variant.parent_image_urls offset:1 %}
    <g:additional_image_link><![CDATA[{{ image }}]]></g:additional_image_link>
    {% endfor %}
    <g:condition>new</g:condition>
    <g:availability>{% if variant.in_stock %}in stock{% else %}out of stock{% endif %}</g:availability>
    <g:brand><![CDATA[{{ variant.vendor }}]]></g:brand>
    {% if variant.weight_grams != 0 %}
        <g:weight><![CDATA[{{ variant.weight_grams }} g]]></g:weight>
    {% endif %}
    <g:gender><![CDATA[{{ variant.attr_gender }}]]></g:gender>
    <g:age_group><![CDATA[{{ variant.attr_age }}]]></g:age_group>
    <g:mpn><![CDATA[{{ variant.sku }}]]></g:mpn>
    <g:gtin><![CDATA[{{ variant.barcode }}]]></g:gtin>
    {% if variant.vendor != "" %}
        <g:identifier_exists><![CDATA[true]]></g:identifier_exists>
    {% else %}
        <g:identifier_exists><![CDATA[false]]></g:identifier_exists>
    {% endif %}
    </item>
{% endfor %}
</channel>
</rss>
NOTE
Did you notice the <![CDATA[]]> block in the sample schema? Here's another example:
<g:link><![CDATA[{{ variant.url }}]]></g:link>
CDATA block is used to escape some illegal characters, such as < and &, inside the XML element's value.
If not escaped, these characters will be interpreted as a part of the schema and will generate an error during the feed's processing.
We recommend enclosing all value patterns in a CDATA block as a precaution.
Change export options for CSV/TXT feed
For CSV and TXT feeds, you can also configure the feed file export options.
In the Export Options section of a CSV/TXT feed template editor, you can edit these options:
- Delimiter. A delimiter, such as comma or tab, that separates each data value.
- Enclosure. Whether data values should be enclosed in single or double quotes.
- Charset. The character encoding format of the text in the file.
- Add Header Row. Whether the feed should have an extra first line with the column names.
- Extra Header. An additional custom row listed above all data, including the header row.
NOTE
Enclosure is mandatory if your data contains delimiters. This will prevent the parser from incorrectly interpreting your data.
For example, you have product descriptions with commas, and at the same time you want to use commas as a delimiter. In this case, you must use enclosure so that the descriptions aren't accidentally parsed as multiple different values.
Change the feed file format
You can easily convert CSV, TXT, and XLSX feeds into any of these formats directly from the feed's configuration page. For that, simply select the required format in the Format field of the feed's general settings and save your changes.

WARNING
Due to the change of the file format, the newly converted feed will have a new URL.
If you've connected this feed to any sales channels, you'll need to manually update the feed URL with the new one. Otherwise, these channels won't be able to fetch your product feed.
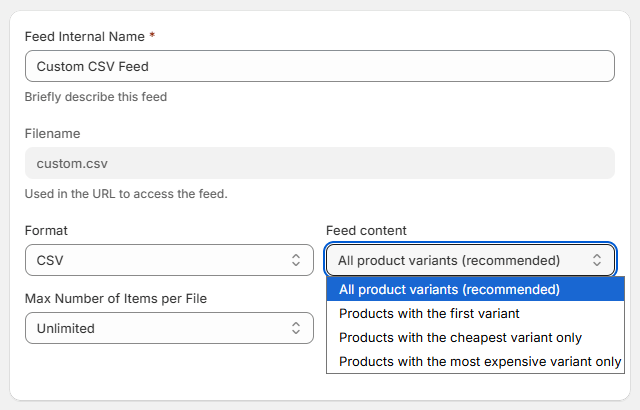
Change the feed content (included variants)
If your products have several variants, you can control which variants to add in the feed. Use the Feed content field of the feed's general settings to include:
- All product variants (if applicable; product variant context only). Includes every possible variant of a multi-variant product.
- Products with the first variant. Includes only the first variant listed for a product (typically the first one created).
- Products with the cheapest variant only. Includes the lowest-priced variant for a product. If multiple variants share the lowest price, the first one found is included.
- Products with the most expensive variant only. Includes the highest-priced variant for a product. If multiple variants share the highest price, the first one found is included.
NOTE
Products without variants are always included in the feed, regardless of the chosen feed content.