App Settings
You can easily customize how Mulwi works for your Shopify store with a wide variety of app settings.
On this page, you will find out how to:
- change the language of the Mulwi app interface;
- configure email notifications for different events;
- enable indexing of Shopify metafields and metaobjects;
- configure a translation service for localizing feeds;
- change the exchange rates used for currency conversion in feeds;
- enable feed analytics to track clicks from sales channels.
Language of Interface
The Language of Interface settings let you set up the language of the app's user interface.

You change the language of Mulwi's interface in such way:
- In your Shopify admin, go to Apps > Mulwi Feeds > Settings.
- Find the Language of Interface section.
- Select your preferred language from the dropdown menu.
- Click Save at the top of the page to apply changes.
- Refresh your browser window for the changes to take effect.
NOTE
The Language of Interface settings only affect the Mulwi app interface. These settings do not change the language of your product feeds or Shopify admin.
Email Notifications
The Email Notifications settings let you specify where Mulwi should email you notifications about different events.

Mulwi can send three types of email notifications:
| Notification type | Description | Examples |
|---|---|---|
| Important emails | Critical updates about your account, subscription, and app status | Welcome email, subscription confirmations, billing reminders, indexing status |
| Notifications about successful fetches | Confirmations when your feeds are successfully uploaded to sales channels | Sales channel fetches feed via URL, feed uploads via FTP/SFTP |
| Notifications about errors | Alerts when something goes wrong with your feeds | Feed generation errors, FTP/SFTP upload failures, URL fetch failures |
You configure email notifications from Mulwi in such way:
- In your Shopify admin, go to Apps > Mulwi Feeds > Settings.
- Find the Email Notifications section.
- Provide your primary email address in the Contact email field. This address is where Mulwi will send you important emails.
- Edit the email addresses in the Notifications about successful fetches field. You can specify multiple recipient emails as a comma-separated list, for example:
[email protected], [email protected]. - Repeat step 4 for the Notifications about errors field.
- Click Save at the top of the page to apply changes.
NOTE
You can unsubscribe from notifications about successful fetches and errors at any time. However, it's mandatory to provide one contact email for receiving important notifications.
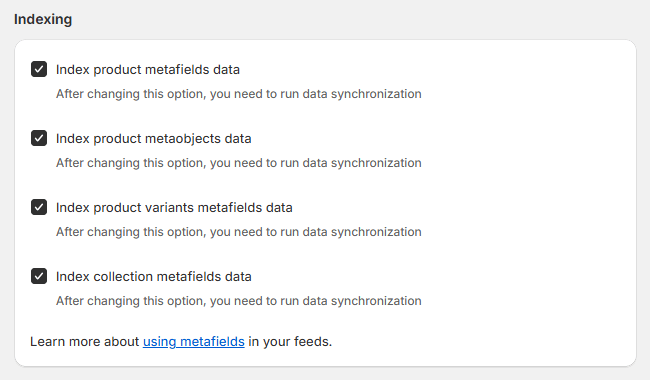
Indexing
The Indexing settings let you enable indexing of Shopify metafields and metaobjects.
You can learn more about how indexing works on the Indexing & Synchronization page.
You change which Shopify metafields and metaobjects Mulwi should index in such way:
- In your Shopify admin, go to Apps > Mulwi Feeds > Settings.
- Find the Indexing section.
- Tick the checkboxes near the types of metafields and metaobjects you need.
- Click Save at the top of the page to apply changes.
- Run a full data synchronization for the changes to take effect across your feeds.
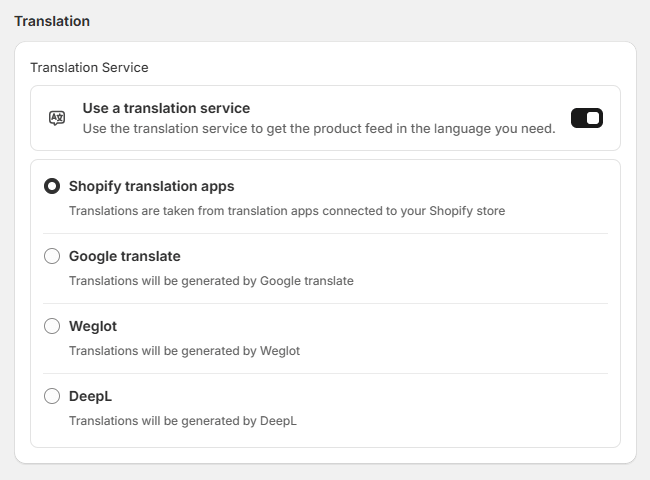
Translation
The Translation settings let you set up a translation service for localizing your feeds.
You can learn more about how feed translation works on the Translate the feed page.
You change the feed translation service for Mulwi in such way:
- In your Shopify admin, go to Apps > Mulwi Feeds > Settings.
- Find the Translation section.
- In the Translation service setting, enable the Use a translation service option.
- Click the radiobutton next to the translation service you need.
- If you selected Google Translate, Weglot, or DeepL, provide the service's API key in the API key input field. You can learn how to get this API key on the Translate the feed page.
- Click Save at the top of the page to apply changes.
NOTE
The Translation settings only affect the product feeds in Mulwi. These settings do not change the language of your Mulwi app interface or Shopify admin.
Currency Conversion
The Currency Conversion settings let you specify a currency conversion service for converting prices to different currencies in your feeds.

You change the currency conversion service for Mulwi in such way:
- In your Shopify admin, go to Apps > Mulwi Feeds > Settings.
- Find the Currency Conversion section.
- Select your preferred currency conversion service from the dropdown menu:
- Shopify JS. Shopify's built-in currency exchange rates that include Shopify's conversion fees. These are recommended if you have Shopify Markets and want the prices in feeds to match those in your Shopify storefront.
- European Central Bank. The official exchange rates published daily by the European Central Bank. These are recommended if you want your feeds to include neutral mid-market reference prices of your products.
- Click Save at the top of the page to apply changes.
NOTE
To use currency conversion in your feeds, you need to add the convert_to_currency modifier (Liquid filter) to the necessary feed attributes.
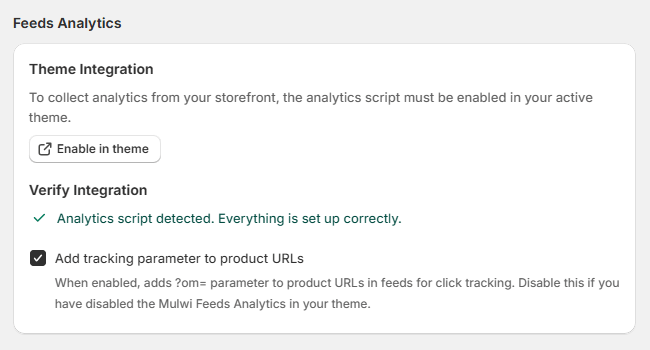
Feed Analytics
The Feed Analytics settings let you set up click tracking for your product feeds.
You enable click tracking for your Mulwi feeds in such way:
- In your Shopify admin, go to Apps > Mulwi Feeds > Settings.
- Find the Feeds Analytics section.
- In the Verify integration setting, tick the Add tracking parameter to product URLs checkbox.
- In the Theme Integration setting, click Enable in theme.
- Enable the Mulwi Feeds Analytics option in the Shopify theme editor.
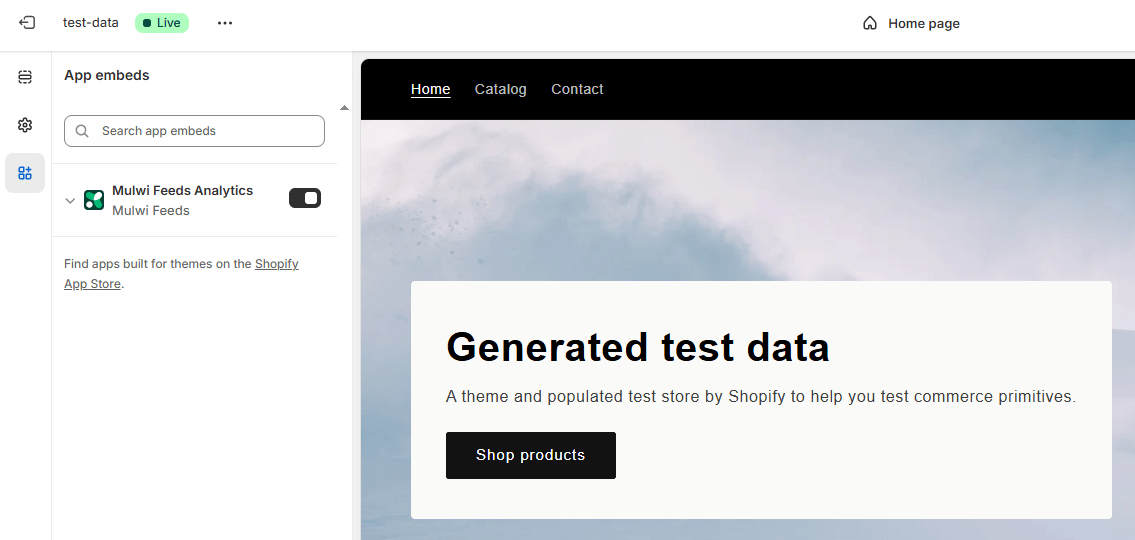
Once you enable the feed analytics script in your Shopify theme, Mulwi will automatically start collecting click data for your product feeds.
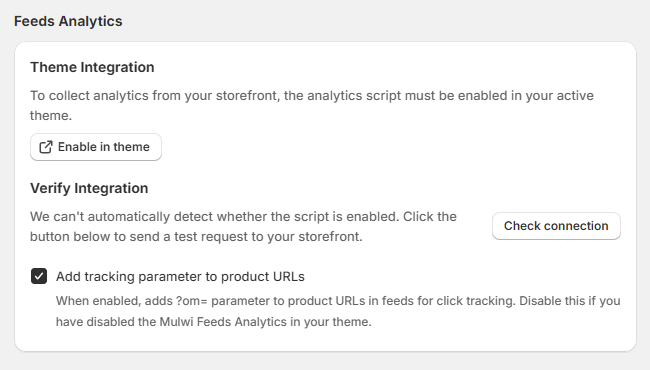
You can verify that Mulwi can track product feed clicks in such way:
- In your Shopify admin, go to Apps > Mulwi Feeds > Settings.
- In the Feeds Analytics section, find the Verify Integration setting.
- Click Check connection. You will be redirected to your Shopify store as part of the connection check.
- Switch back to Mulwi's Feeds Analytics section and check your Verify Integration status. It should state Analytics script detected.