Idealo
On this page, you will find out how to:
- prepare an Idealo product feed using Mulwi;
- connect your Shopify store to Idealo;
- upload your Mulwi feed to Idealo.
1. Create the product feed
Before connecting your store to Idealo, you first need to create and configure the feed. To do this, log in to your Shopify store admin and follow these steps:
Steps for creating an Idealo product feed in Mulwi
- Go to Apps > Mulwi Feeds > Feeds.
- Click Add Feed to generate the new feed.
- Choose the Idealo feed template. The feed is created in CSV format.
- In the pop-up window, select which product data to use as feed content and click Create. You can change this later in the Feed content field of the feed's general settings if necessary.
- Set feed's status in the This feed is currently block to Active.
- Fill in the general feed information:
- Feed Internal Name. Give your feed a descriptive name.
- Filename. Give your feed file a unique name.
- Max Number of Items per File. Limit the amount of products in the feed.
- Compression. Compress the feed file if necessary.
- Protect feed with password. Password-protect your feed if necessary.
- In the Applied Filters section, you can use product filters to choose what products should be included in the feed.
- In the Template section, pick appropriate values for Idealo's required Attributes:
- Fulfillment Type. Select the method used to deliver the product: Parcel Service, Freight Forwarder, Download, or Letter.
- Delivery Service. Select the shipping carrier that delivers your products to customers.
- Delivery Costs. Specify the cost of shipping the product in the same currency as your product prices. Enter it as a numeric value using period as a decimal separator (for example, 4.99).
- Delivery Time. Specify the product's estimated shipping duration in working days. You can enter the value solely as a text string (for example, Delivery on the next working day) or as a combination of numbers and text (for example, Delivery in 2-4 working days).
- Free Return Days. Specify the number of days during which the product can be returned for free. Enter it as a whole numeric value (for example, 14 for 14 days).
- Base Price. Specify the product's price per unit with the measurement units. For example, enter 1.99€/100g if the product is measured in kilograms and costs 1.99€ per 100g.
- Size. Select all the attributes that indicate the product's size.
- Color. Select all the attributes that indicate the product's color.
- In the Source of prices section, you can set product prices from Markets or Price Lists.
- In the Stock Locations section, select from which locations you want to include stock levels and availability information.
- In the Translation section, you can select a language to translate your feed into.
- Configure the Google Analytics section if you have an analytics campaign.
- Click Save at the top of the page to finish and generate the feed.
NOTE
You won't be able to change the Filename after you save the feed.
After saving the new feed, you can customize it if necessary.
You will also be able to map your categories to the Idealo Product Taxonomy. To do that, fill out the Idealo Product Category field in the feed's Template section.
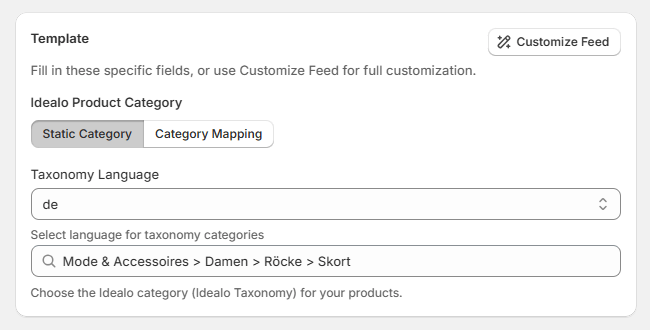
If your products have the same category, use Static Category from the necessary Taxonomy Language. Start typing the category name or ID and choose the appropriate category from the dropdown menu. For multiple categories, use Category Mapping.
NOTE
If you need help setting up, optimizing, or troubleshooting your feed, don't hesitate to contact our support team. We will be happy to assist you.
2. Connect your store to Idealo
You connect your store to Idealo through a respective account on the Idealo Business platform.
NOTE
Idealo requires a product feed URL during registration, which is why you need to prepare a feed beforehand. Create a product feed if you don't have it yet.
During the registration process, you will need the feed URL from the Mulwi Shopping Feeds app.
To find this URL in Mulwi, navigate to the feed you want to upload and click the Copy feed URL button in the Feed block.
The feed URL will be copied to your clipboard.
To register on Idealo Business and connect your online store to Idealo, follow these steps:
Steps for registering on Idealo Business and connecting a Shopify store to Idealo
First, you will register a new Idealo Business account:
- Go to the Idealo Business registration page.
- Fill in your Email address in the input field and click Register.
- Go to your email inbox and find a confirmation email from Idealo.
- Open this email from Idealo and click the confirmation link in it.
- On the new page you were redirected to, fill out your contact details, such as First name and Last name, and create a Password for your account.
- Click Submit registration to finish creating an account.
After that, you will be redirected to a store registration page.
Here, you can immediately connect your store to Idealo:
- Fill out basic Shop information:
- Your shop URL. Enter your store's website address.
- Registration for. Choose the regional Idealo website where you want to sell.
- I am a manufacturer. Tick the checkbox if you manufacture products yourself.
- I carry at least one private label. Tick the checkbox if you have any private brands and write their names in the List of own brands input field.
- Click Continue.
- In the Information about the contracting party section, provide your store's business information, such as its name and physical address, as well as the email address where Idealo will send you reminders of your invoices.
- In the Information about the contact person section, enter the name, phone number, and email address of the person whom Idealo can contact in case of any question.
- Click Continue.
- In the Information on product data transfer section, paste the feed URL you've copied from Mulwi in the Feed URL input field. If your feed is password-protected, provide the Username and Password to access it.
- Click Continue.
- Check the information you've provided. If you need to change something in a section, click the Edit button next to its name.
- Tick the checkboxes in the Terms & Conditions section to agree with Idealo's terms, conditions, and prices.
- Click Submit registration to send the connection request to Idealo.
Afterwards, wait for Idealo's staff to manually review and approve your application.
3. Upload the new feed to Idealo
You can either update your currently linked feed or connect a new feed using a different URL.
How to update a currently linked Idealo feed
If you only changed the product information, then you don't need to do anything: Idealo will automatically detect and process these updates.
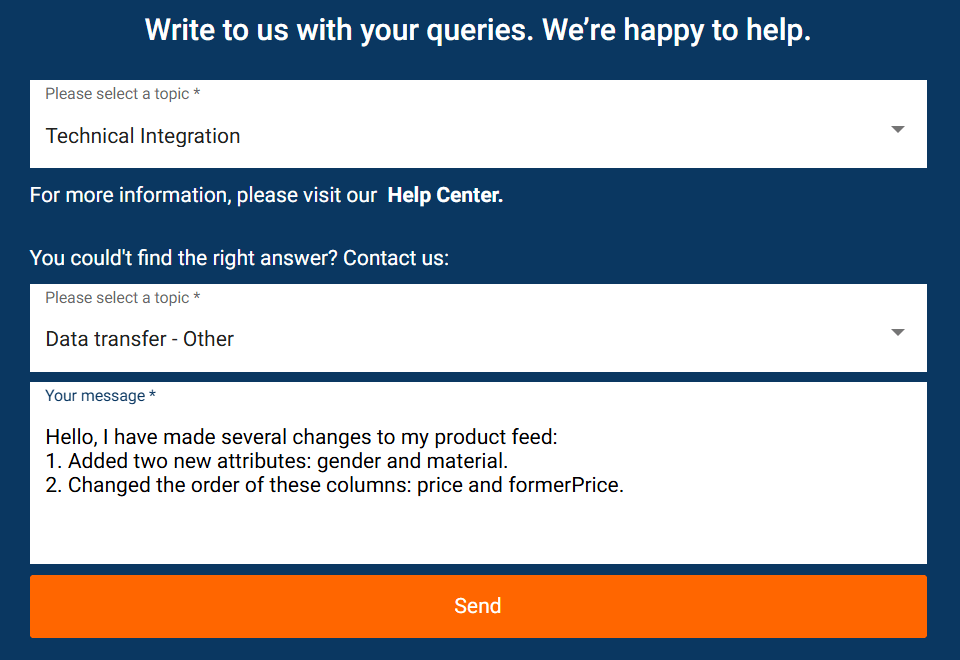
However, if you made any changes to the structure of your feed (for example, added a new attribute), then you need to notify Idealo's technical team about it:
- Log in to your Idealo Business account.
- Go to My idealo > Contact.
- Select Technical Integration as your query topic.
- Select Data transfer - Other as your query subtopic.
- In the Your message box, describe the changes you've made to your feed.
- Click Send to finish and send your message.
Request to update an existing feed
How to connect a new Idealo feed with a different URL
NOTE
Idealo supports only one product feed per store. Once you connect a new feed, the information from your previous feed will not be shown on Idealo.
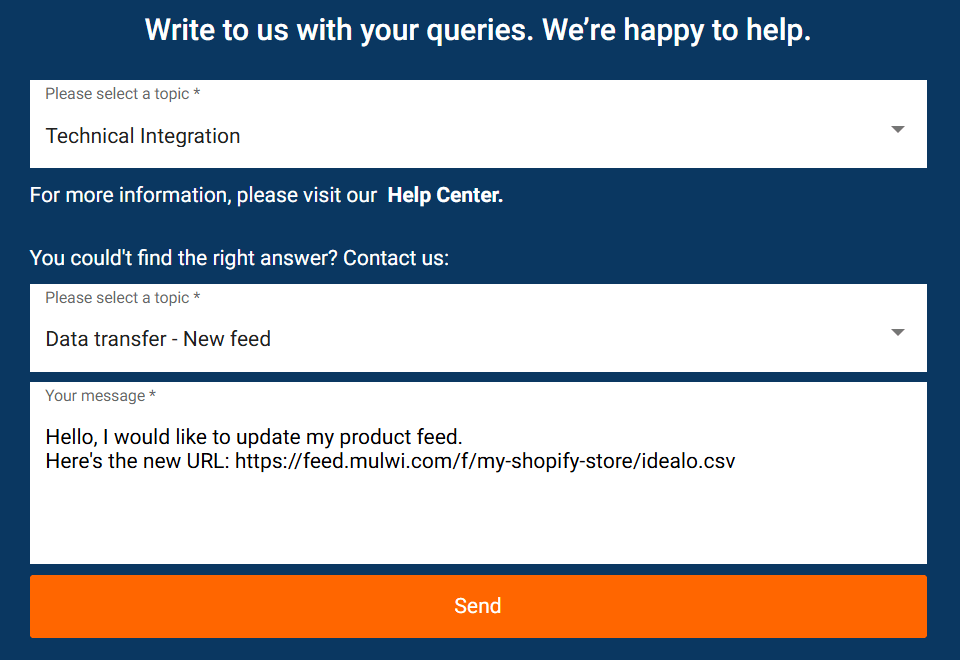
If you want Idealo to fetch a product feed from another URL, you need to send this new URL to Idealo's technical team:
- Log in to your Idealo Business account.
- Go to My idealo > Contact.
- Select Technical Integration as your query topic.
- Select Data transfer - New feed as your query subtopic.
- In the Your message box, specify your new feed URL.
- Click Send to finish and send your message.
Request to connect a new feed
Idealo's team will then update your feed URL with the new one you provided.